Thursday 17 September 2015

Stacked Boutique Bow


This set of instructions is for a small stacked boutique bow with a completed size of approximately 4 inches across. If you wish to increase the size of your bow, please remember that the ribbon for your surround-a-bow must be 3 inches longer than the ribbon used for your centre bow.
I use 3 separate components to create the stacked bow, but please feel free to use these components separately in other projects if you wish.

Lets Get Started!!

You will need - a lighter, needle, thread, hairspray (optional), 2 wide ribbons (one inner and one main/outer) for your centre bow, thin ribbon for around the centre of your bow, thin ribbon for your surround-a-bow, and up to 3 coordinating wide ribbons for your ribbons spikes.

Component One - Figure 8 Loop Boutique Bow

1. Measure 2 x 14 inches of your chosen main ribbon (one length from each ribbon). Heat seal the ends by lightly running a lighter flame across each end. Prepare your needle and thread with approx. 30cm of thread, doubled over and knotted at the end.


2. Lay your two ribbons directly on top of each other wit the main ribbon facing outwards. Using the two ribbons layered together creates a more structured bow. Fold your ribbon in half and mark the centre.


3. Using the centre point as a reference, loop each end of your joined ribbon to overlap in the centre creating a figure 8. Ensure each tail of your ribbon is looped in the opposite direction. Hold in place.


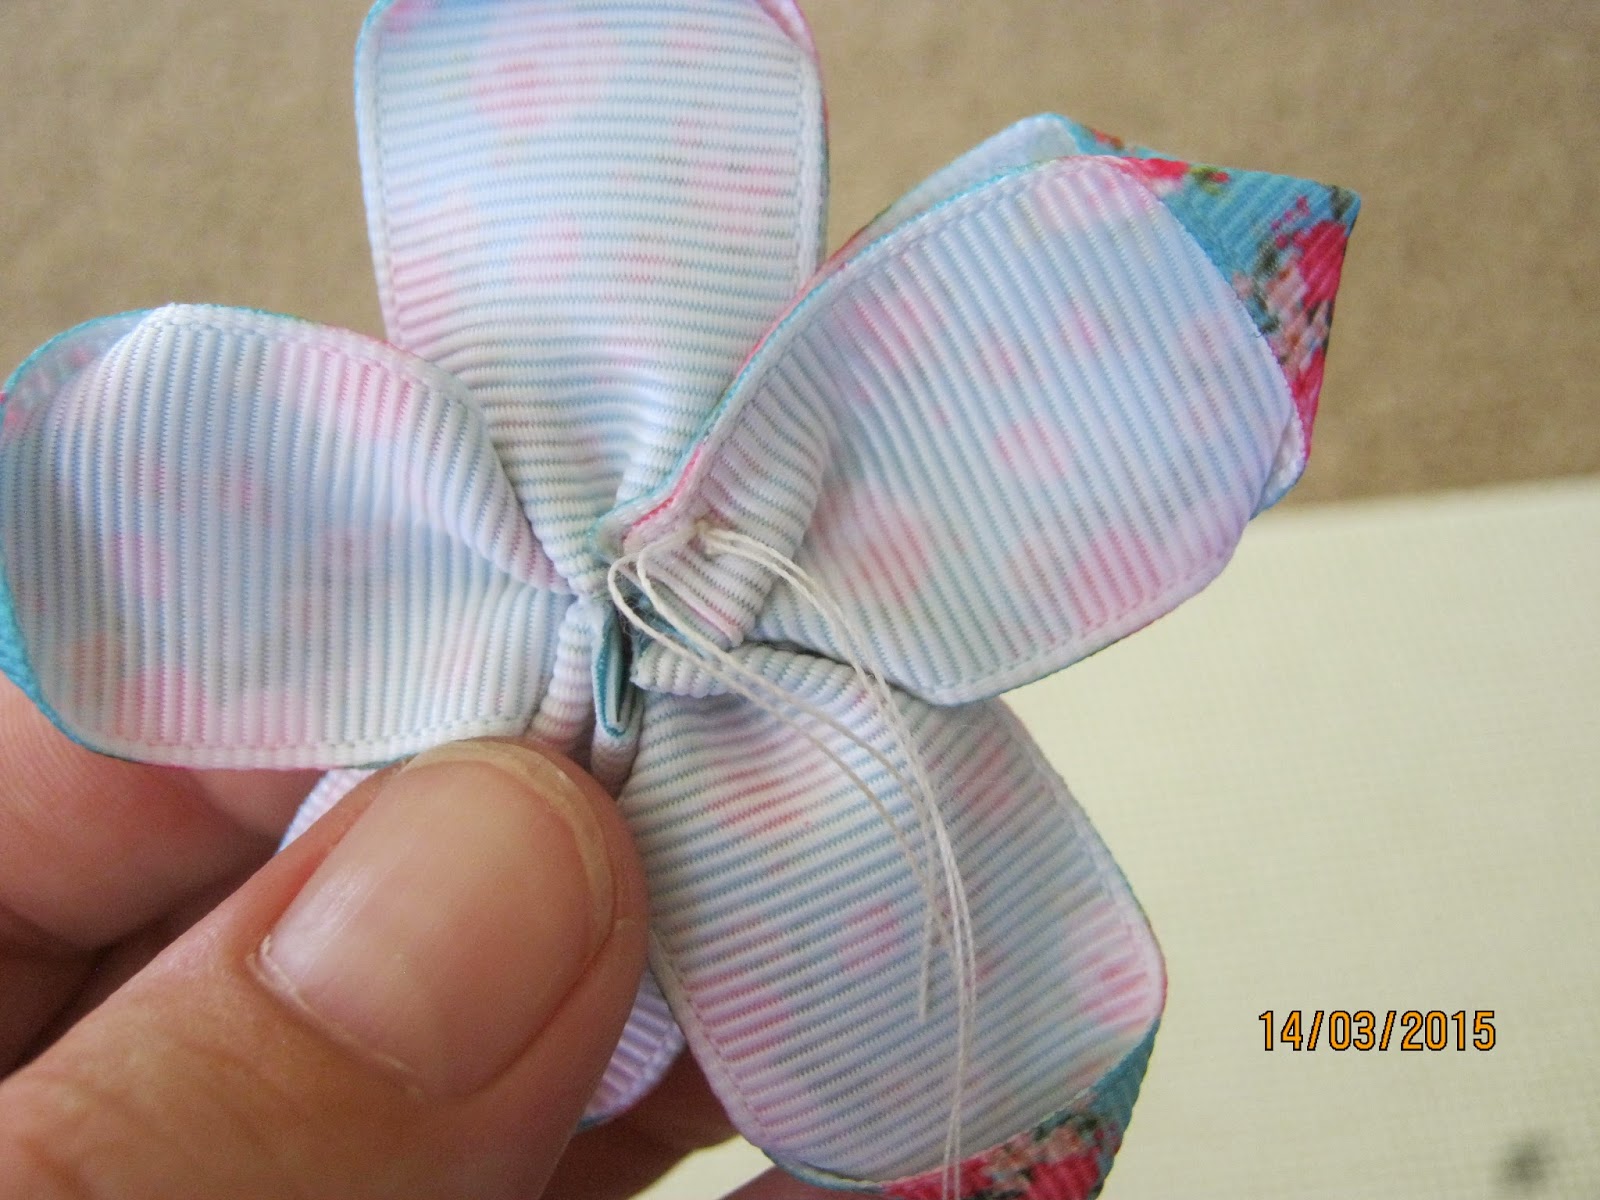
4. Next, bring the inside of each loop to the centre of your figure 8. They will overlap slightly. Adjust them so that the loops sit evenly. Use your needle and thread to tack them in place going from top to bottom. Do NOT cut off your needle and thread, leave it in place for the next set of steps.


5. Flip your bow over so that the ribbon at the back is running horizontal and the ribbon at the front makes a nice "X" shape.


6. Fold and pinch the centre of your bow together and wrap your excess thread around it tightly 3 times and then secure it by tying it off at the back.


7. To adjust and "fluff" up your bow loops, hook your fingers into each loop and give it a bit of a tug. Wriggle them around until you are happy how they are sitting. Take a moment to spray your bow in hairspray and set it aside for a few minutes to dry. This will help the loops to maintain their shape. If you don't have any hairspray handy, do not worry as this is not an essential step but will help with the lifetime shape of your bow.


You have now completed the first component. If you are creating a stacked bow please continue on to component two. If you are using this bow on its own, please continue onto step two of assembly.


Component Two- The Surround-a-Bow

1. Measure out 17 inches of your chosen ribbon. A thinner ribbon works best for this component. Heat seal the ends. Fold and mark the centre. Prepare your needle and thread with approximately 15cm of thread, doubled over and knotted at the end.


2. Using the marked centre point as a reference, bring each opposite end in to create a figure 8 as shown in the below picture.


3. Whilst holding your figure 8 in place, bring the outside of each loop into the centre.They will overlap slightly. Adjust your loops so that they are even and then tack them in place and tie off your thread. Trim your excess thread.


You have now completed your second component.


Component Three - Ribbon Spikes


1. Measure 3 (or more) lengths of your chosen ribbon at 4 inches long each. A wider ribbon works best for this component. Dovetail and heat seal the ends of your ribbon. 


2. Prepare your needle and thread with approx 15cm of thread doubled over and knotted at the end.

3. Overlap your ribbon spikes as shown below. Secure them together with your needle and thread by stitching down through the centre, pulling it in tight and tying it off at the back.


You have now completed component three. You are now ready for assembly.


ASSEMBLY

You should have your three completed components as shown below.


1. Layer each of your components together with your spikes at the bottom, the surround-a-bow in the middle and your boutique bow on top. Adjust each component so that they sit well together. Once your are happy with their placement, dab a small amount of hot glue between each component and hold it together firmly until the glue dries.


2.  Measure approximately 5 inches of your chosen ribbon for your bows centre. The ribbon can be trimmed down as your glue it to your bow if the ends overlap too much due to differences in bow thickness so these lengths are just approximates.

3. Place a small dab of glue on the front centre of your assembled bow and adhere the centre of your middle ribbon to it in a vertical direction. Flip your bow over and bring the tails of your middle ribbon around to the back. Glue down the tails of your ribbon so that they overlap neatly at the back. Trim off and heat seal any excess ribbon as you do so. While the glue dries and you hold it steady, quickly adjust all your loops and spikes so that they are sitting neatly.


4. Flip your bow over and admire your handy work. You are now able to embellish it if you wish and then attach it to a clip or headband of your choice.


Thank you for following along with this tutorial. If you have any queries please do not hesitate to ask!


Monday 29 June 2015

Double Loop Bow Tutorial


For this bow you will need: wide ribbon, Narrow ribbon, tape measure, scissors, needle and thread, a lighter, a hot glue gun. 

1. Cut two lengths of wider style ribbon, each 9 inches long. You can either choose to use the same ribbon for the entire bow or your can coordinate different ribbons. Its up to you. Next cut a 3 inch length of a thinner coordinating ribbon for the centre of your bow. Thread and knot approximately 40cms of cotton onto a needle, leaving a few centimetres of cotton tail at the end for knotting and tying off. You can also complete this bow with three loops if you like. Adding a third loop will create more of a pinwheel bow. 


2. Heat seal the ends of all your ribbon by gently running them through the flame of a lighter. This will ensure they do not fray.

3. Overlap the two ends of your first piece of ribbon and pinch it together in the centre as shown in the picture below.


4. Starting at the back where the edges overlap make small and spaced stitches down the middle of your bow. Do NOT cut or tie off your thread yet.


5. Take your next piece of ribbon and fold it into a matching loop. Line it up directly below the top loop and continue your stitches directly down the middle of this loop. It should look like the picture below.  If you are choosing to add a third loop to make a pinwheel bow, now is the time to do so.


6. Then, gently pull on your thread to gather in the middle of your bow. Ensure that your loops stay stacked on top of each other neatly.


7. Wrap your thread tightly around the centre of your bow 3 times and then tie it off at the back. Now is a good time to adjust your loops to ensure they are sitting nicely. Its ok to tug on them a little.


8. To finish off your bow take your chosen centre ribbon. You can now choose to either leave the centre ribbon flat as show in the picture or you can choose to add a decorative knot. To add the decorative knot simply tie a tight and even knot in the centre of your ribbon. I have included an example photo. Using your hot glue gun place a small dot of glue on the front centre of your bow and stick down the middle of your centre ribbon. Then flip your bow over and fold each of the tails of ribbon down, one at a time, securing them with hot glue to the back of the bow. If the tails of your ribbon are too long to tuck in neatly at the back, simply trim them and heat seal them before gluing them down.


9. You should now have a completed bow that looks similar to this.


Great job!! Your bow is now ready to attach to a clip or headband of your choice!


Wednesday 20 May 2015

Folded Ribbon Flower


To make this flower you will need:


A 40cm length of ribbon (between 16mm-22mm wide), a lighter, needle and thread and a small section of felt.


1. Begin by cutting your ribbon into 5 x 8cm lengths. Heat seal each of the ends by running them gently through the flame of a lighter. This will prevent fraying. Next, cut a length of thread approximately 40 cm long and thread it through your needle. Knot off the end leaving approximately 2cm of tail.


2. Take your first piece of ribbon and have it so the underside is facing up. Fold your ribbon approximately half way down on a right angle pointing towards the right. Then, keeping the fold pinched, fold the ribbon back on itself towards the left so it folds in half. Adjust your fold so that the two ends of the ribbon meet up. The side facing you (shown white in my picture) in the underside. Flip your ribbon petal over. So far so good!!!


3. Take your needle and thread and straight stitch along the bottom edge of your petal. Pull your thread all the way through up to the knot. Complete step 2 for your other four pieces of ribbon and add them onto your thread so they are all in a line.


4. Once you have all five petals threaded on, squish them along so they are all bunched up like petals on a flower. Flip your flower over and using your excess thread, tighten in your petals and tie a knot. It should look like the picture below. Flip your flower back over and adjust your petals so that they sit how you wish.


5. Once you have completed your flower you should glue a small 10cent piece size circle of felt to the back so that you can add it onto a hairclip or headband. You may now also glue or stitch your chosen embellishment to the centre of your flower. You should now have a completed flower that looks similar to the flower below. Great work!! Now go and make a heap more. :)


Saturday 21 March 2015

A Good Starting Point

So you LOVE to craft but aren't really sure where to start from a supply point of view, well this post is for you. Im going to give you a few good starting points with regard to hardware, ribbons, elastics and embellishments.

My go-to site for hardware is http://www.wholesalehairclips.com.au/
They do great quality alligator clips and headbands. They also sell non slip grips and my number one must have - D670 double sided tape, for lining all my clips.

My next hot tip is awesome ribbons as well as great supplies. For brilliant patterns and characters go to http://www.dancinginribbon.com.au/ or http://www.ribbonandbowstudio.com.au/. The have an enormous range and have a few different postage options.

If you are looking for straight out beautiful head over to http://www.camillesribbonbowtique.com.au/
I have never seen more prettiness in one place than here. If you are a Brisbane local, she also does a open day once a week, so look her up on facebook.
I absolutely love buying florals, ready made flowers, rhinestones, mixed bags of headband elastic and grosgrain ribbon on this site. One of my all time favourite places.

If you like using bottle caps or making jewellery head over to https://www.facebook.com/FreeSpiritBottleCapImagesAndSupplies. Her range is great, as is her quality. She is a lovely lady too!

I also trawl an Australian Facebook page called Crafters Clearance. https://www.facebook.com/groups/aussie.craft.garage.sale/
So many brilliant bargains to be found by locals as well as businesses.
A great go-to site.

If packaging your product is something you are interested in pop on by MiMuMee. I use their natural hairclip display cards and have always been happy with their professional quality. http://shop.mimumee.com.au/

There are SSOO many other amazing businesses to purchase your supplies from, but these are just a few that I use and they will hopefully get you on your way.

If you have any questions, please do not hesitate to ask.

xx Tegs.

Friday 13 March 2015

How to Line an Alligator Clip


You will need double sided tape, an alligator clip, ribbon and a lighter.


1. Measure a 10cm length of double-sided tape with a ruler. Cut the piece of tape with scissors. Starting at the base of the clip place the double-sided tape onto the underside of the clip about a centimetre in from the hinge. The underside of my alligator clips have a small circular hole. Ensure you clip is the right way up. Press the tape onto the clip firmly to ensure it adheres. I use a special type of framers tape which is especially strong called D670 tape. As an alternative to double sided tape, you may also follow the same method solely with ribbon using hot glue.


2. Continue pressing the tape over the hinge end, pressing the tape into the hinge with the tip of your finger and then pressing the tape around the top of the clip. Then follow along the top side of the clip, remembering to press down firmly.


3. Open the alligator clip by pinching the hinge with you fingers. Hold the clip open. Attach the sticky end of the tape to the top inner edge of the clip.


4. Press down on the tape covering your clip to ensure it is adhered to it firmly. 

5. Measuring the same length of ribbon as you did with the tape in step one, heat seal the ends of the ribbon by gently running the ends thorough the flame of a lighter. This will ensure your ribbon does not fray. 

6. Doing a small section at a time, Remove the backing off your double-sided tape and follow along the same path with your ribbon, pressing down firmly to ensure it sticks. 


You should now have a completed and lined alligator clip ready to wear on its own to attach to one of your creations. I often will add a non-slip grip to the topside inner prong of my clip to help it stay firm in my hair.


If you have any questions or comments, please do not hesitate to let me know.

x Tegs.